Black & White Chocolate Chip Cookies

OLYMPUS DIGITAL CAMERA

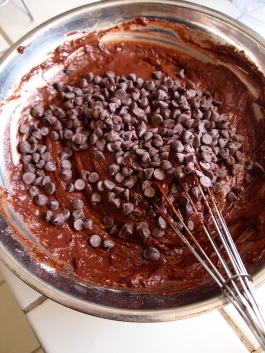
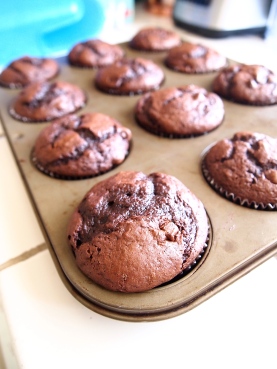
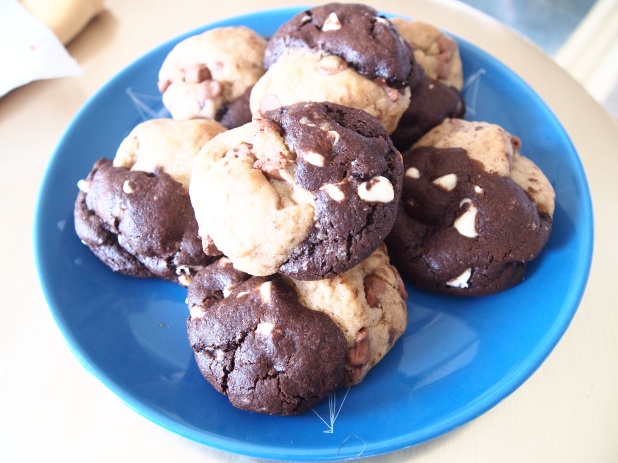
I guess you could call this one of my more indecisive bakes. I knew I wanted to bake some cookies but I didn’t really know what kind. Chocolate? Peanut butter? Chocolate chip? Red velvet? Snickerdoodles? So I just decided to combine two of my favorite cookies – a chocolate white chocolate cookie & a chocolate chip cookie. I mean, why not right?! Take a bite of one side when you want something fudgy, rich & decadent and a bite of the other when you want that classic chocolate chip.
OLYMPUS DIGITAL CAMERA OLYMPUS DIGITAL CAMERA
Personally, I preferred the chocolate white chocolate side – only because I absolutely love anything rich & intensely chocolate. I feel like if you’re going to give into those cravings, you should go big or go home! However, I think having both provided a really nice balance, especially for those that don’t like anything too intense.
OLYMPUS DIGITAL CAMERA
I’m used to putting a bit of pudding mix into my cookie dough to keep it nice & soft, but these really didn’t need any! They were still perfectly fluffy & moist without it.
To create these cookies, I used a slightly modified recipe from Sally’s Baking Addiction. Ingredient were purchased from Stater Bros. & Wholesome Choice.

Ingredients & Costs:

Chocolate White Chocolate Cookie Dough

  • 1/4 cup unsalted butter, softened to room temperature = $0.56
  • 1/4 cup granulated sugar = $0.04
  • 1/4 cup brown sugar = $0.03
  • 1/2 large egg = $0.15
  • 1 teaspoon vanilla extract = $0.10
  • 1/2 cup all-purpose flour = $0.14
  • 1/4 cup + 1 Tablespoons unsweetened cocoa powder = $0.26
  • 1/2 teaspoon baking soda = $0.01
  • 1/4 teaspoon salt = $0.01
  • 1 Tablespoons milk = $0.04
  • 1/2 cup + 1 Tablespoon white chocolate chips = $0.65

Chocolate Chip Cookie Dough

  • 1/4 cup + 2 tablespoons unsalted butter, softened to room temperature = $0.60
  • 1/4 cup + 2 tablespoons brown sugar = $0.04
  • 1/8 cup granulated sugar = $0.02
  • 1/2 large egg = $0.15
  • 2 teaspoons vanilla extract = $0.20
  • 1 cup all-purpose flour = $0.28
  • 1 teaspoon cornstarch = $0.02
  • 1/2 teaspoon baking soda = $0.01
  • 1/4 teaspoon salt = $0.01
  • 1/2 cup + 1 Tablespoon (202g) semi-sweet chocolate chips = $0.51

Grand Total = $3.83

Directions:

Original recipes makes 16 – 20 cookies

Chocolate White Chocolate Cookie Dough

  1. Cream the butter and sugars together until light and fluffy. Beat in the egg and vanilla on high speed until combined.
  2. In a separate bowl, combine the flour, cocoa powder, baking soda, and salt.
  3. Slowly mix it into the wet ingredients on low speed. The dough will be thick. Again on low speed, mix in the milk until combined. The dough will become stickier. Finally, fold in 1 cup of white chocolate chips.

Chocolate Chip Cookie Dough

  1. Cream the butter and sugars together until light and fluffy. Beat in the egg and vanilla on high speed until combined.
  2. In a separate bowl, combine the flour, cornstarch, baking soda, and salt. Slowly mix it into the wet ingredients on low speed. The dough will be thick. Fold in 1 cup of chocolate chips.

Cover both cookie doughs with aluminum foil or saran wrap and chill for at least 2 hours or up to 3 days. Preheat oven to 350F degrees and line cookie sheet with silicone baking mat or parchment paper. Measure 1.5 Tablespoons of chocolate cookie dough. Roll into a ball. Take 1.5 Tablespoons of chocolate chip cookie dough. Roll into a ball. Press the two balls together between your hands and roll them into 1 large ball. Repeat rolling for each cookie. Bake the cookies for 10-11 minutes. The cookies will look very soft, puffy, and almost undone. Remove from the oven. Allow the cookies to cool on the cookie sheet.

Cookies remain fresh and soft for up to 10 days in an airtight container at room temperature. Feel free to like or share this post, and let me know in the comments how your confused cookies turn out!
Happy Baking,
Cindy

Simple Dough for Curry Puffs

OLYMPUS DIGITAL CAMERA

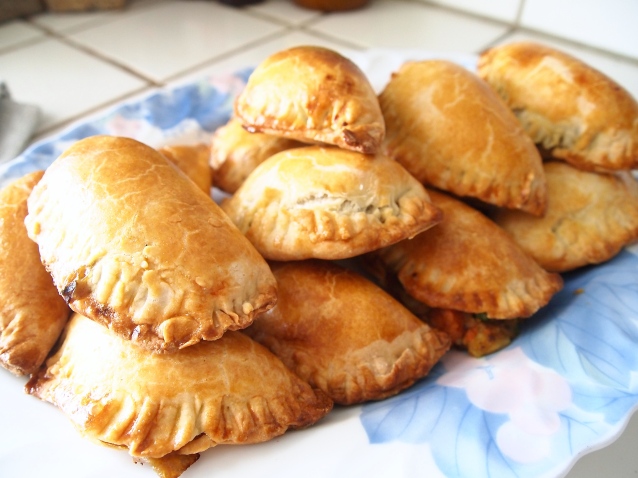
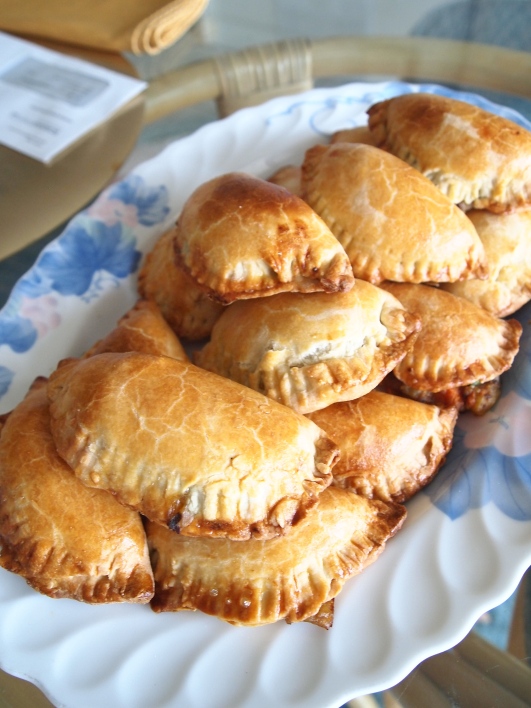
My first savory bake on the blog – Curry Puffs! This post will be focusing on the delicious dough I used. So buttery, light & simple to make.

OLYMPUS DIGITAL CAMERA OLYMPUS DIGITAL CAMERA

My dad had been requesting some curry puffs for awhile and I finally decided to satisfy his craving. The dough is very similar to what my Aunt uses for her Thai curry puffs, which I always look forward to when she brings them over for Thanksgiving. I learned the technique to make them from my Grandpa quite recently and ended up using my mom’s leftover Japanese curry. So I’d definitely say this is a family fusion recipe!

OLYMPUS DIGITAL CAMERA OLYMPUS DIGITAL CAMERA

For the dough, I used a basic recipe from Epicurious. My mom made the curry filling made a few days before I made the curry puffs and I added some potatoes & peas to create a thicker consistency. That being said, you can really get creative with the filling – fruits, cream cheese, chorizo & potatoes. I’m sure they would all taste great!

OLYMPUS DIGITAL CAMERAIngredients & Costs:

  • 2 1/4 cups all-purpose flour = $0.63
  • 1 1/2 teaspoons salt = $0.03
  • 1/2 cup (1 stick) cold unsalted butter, cut into 1/2-inch cubes = $1.13
  • 1 large egg = $0.32
  • 1/3 cup ice water = $0.03
  • 1 tablespoon distilled white vinegar = $0.01

Grand Total = $2.15

Directions:

Original recipes makes approximately 15 – 18 curry puffs

  1.  Sift flour with salt into a large bowl and blend in butter with a blender until mixture resembles coarse meal with some (roughly pea-size) butter lumps.
  2. Beat together egg, water, and vinegar in a small bowl with a fork. Add to flour mixture, stirring with fork until just incorporated.
  3. Turn out mixture onto a lightly floured surface and gather together, then knead gently with heel of your hand once or twice, just enough to bring dough together. Form dough into a flat rectangle and chill, wrapped in plastic wrap, at least 1 hour. Keep for up to 2 days refrigerated.

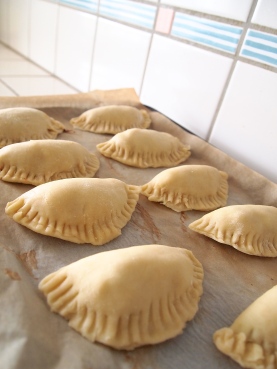
To make curry puffs, split dough into 2 tbsp pieces (appx. 15-18 total) and roll out dough on floured surface. Fill center of each pastry round with about 1- 2 tbsps of curry or filling of your choice. Fold over dough to form curry puff shape (half moon). Seal dough by crimping around edge with a fork, pressing and pulling fork to cut through both layers. Place on baking sheet and brush tops with beaten egg. Bake in preheated 425-degree oven 23 to 28 minutes.

I’d be more than happy to do a blog post on how to make the curry – just let me know if you guys would like to see that in the comment section. And feel free to leave any comments, questions or suggestions about the dough below!

Happy Baking,

Cindy

Salted Caramel Apple Pie Bars

OLYMPUS DIGITAL CAMERA

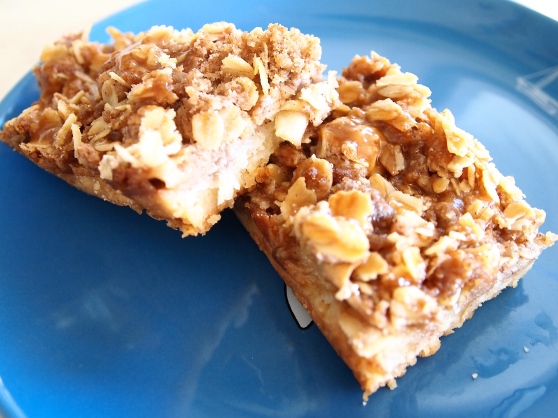
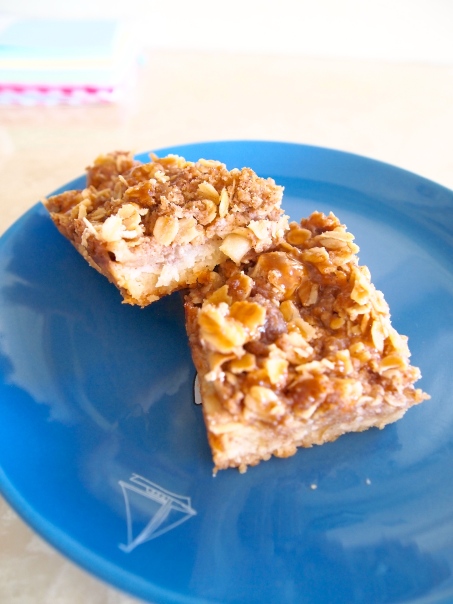
For Thanksgiving this year, my dad requested something crunchy, my mom wanted something with cinnamon and my little sister wanted something with apples. To try and please everyone, I decided to try out these Salted Caramel Apple Pie Bars and they turned out amazing! Salted caramel fans – here’s another recipe to go on your “Must Bake” list.

OLYMPUS DIGITAL CAMERA OLYMPUS DIGITAL CAMERA

Personally, I like using Fuji apples for everything. However, if you prefer something a little less sweet, try using one tart apple (Granny Smith) and one sweet apple (Honey Crisp).

Be generous with drizzling on the salted caramel sauce. I kept some of it to use on a chocolate cheesecake the next day, but if I had made more I would’ve put all of it on the bars – it’s really that good!

OLYMPUS DIGITAL CAMERA

Also, please don’t be intimidated by the ingredient list –  a lot of the ingredients are repeats and if you’ve ever made an apple pie before, I personally feel that this is even easier to bake since you don’t have to worry about prepping both crusts.

I used a slightly modified recipe from Sally’s Baking Addiction and purchased all of my ingredients from Stater Bros.

Ingredients & Costs:

Shortbread Crust

  • 1/2 cup unsalted butter, melted = $1.13
  • 1/4 cup granulated sugar = $0.04
  • 1 teaspoon vanilla extract = $0.10
  • 1/4 teaspoon salt = $0.01
  • 1 cup all-purpose flour = $0.28

Apple Filling

  • 2 large apples, peeled and thinly sliced (1/4 inch thick) = $1.42
  • 2 Tablespoons all-purpose flour = $0.04
  • 2 Tablespoons granulated sugar = $0.02
  • 1 teaspoon ground cinnamon = $0.19

Streusel

  • 1/2 cup old-fashioned oats = $0.13
  • 1/3 cup brown sugar = $0.04
  • 1/4 teaspoon ground cinnamon = $0.05
  • 1/4 cup all-purpose flour = $0.07
  • 1/4 cup unsalted butter, cold and cubed = $0.56

Salted Caramel Sauce

  • 1/2 cup granulated sugar = $0.08
  • 3 Tablespoons unsalted butter, cut up into small pieces = $0.56
  • 1/4 cup heavy cream = $0.39
  • 1-2 teaspoon salt = $0.02

Grand Total = $5.13

Directions:

Original recipe makes approximately 9-16 bars.

  1. Preheat the oven to 300F degrees. Line an 8-inch baking pan with aluminum foil, leaving an overhang on all sides. Set aside.
  2. Shortbread crust: stir the melted butter, granulated sugar, vanilla, and salt together in a medium bowl. Add the flour and stir until everything is combined. Press the mixture evenly into the prepared baking pan. Bake for 15 minutes while you prepare the filling and streusel.
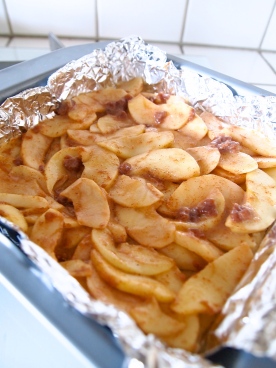
  3. Make apple filling: Combine the sliced apples, flour, granulated sugar, and cinnamon together in a large bowl until all of the apples are evenly coated. Pan fry on low for 5 minutes. Set aside.
  4. Make the streusel: Whisk the oats, brown sugar, cinnamon, and flour together in a medium bowl. Cut in the chilled butter with a pastry blender or two knives or forks (or even with your hands) until the mixture resembles coarse crumbs. Set aside.
  5. Remove the crust from the oven, and turn the oven up to 350F degrees. Evenly layer the apples on top of the warm crust. It will look like there are too many apple slices, so layer them tightly and press them down to fit. Sprinkle the apple layer with streusel and bake for 30–35 minutes or until the streusel is golden brown. Remove from the oven and allow to cool for at least 20 minutes at room temperature.
  6. Make salted caramel sauce: Heat granulated sugar in a medium saucepan over medium heat, stirring constantly with a rubber spatula. Sugar will form clumps and eventually melt into a thick brown, amber-colored liquid as you continuously stir. Once sugar is completely melted, immediately add the butter and stir until it is completely melted, about 2-3 minutes. Very slowly, drizzle in 1/2 cup of heavy cream while whisking. Allow the mixture to boil for 1 minute. It will rise in the pan as it boils. Remove from heat and stir in 1 teaspoon of salt. Allow to cool down before using.
  7. Lift the foil out of the pan using the overhang on the sides and cut into bars. Once cut, pour salted caramel sauce on top. These apple pie bars can be enjoyed warm or cold.

The bars will stay fresh in an airtight container in the refrigerator for 3 days or frozen up to 3 months – thaw overnight in the fridge, then drizzle with extra salted caramel before serving. Cover the caramel tightly and store for up to 2 weeks in the refrigerator. Warm the caramel up for a few seconds before using in a recipe.

As always, thank you for reading this blog post and let me know if you try out this recipe! 

Happy Baking,

Cindy

Matcha Cupcakes with Azuki Bean Frosting

OLYMPUS DIGITAL CAMERA

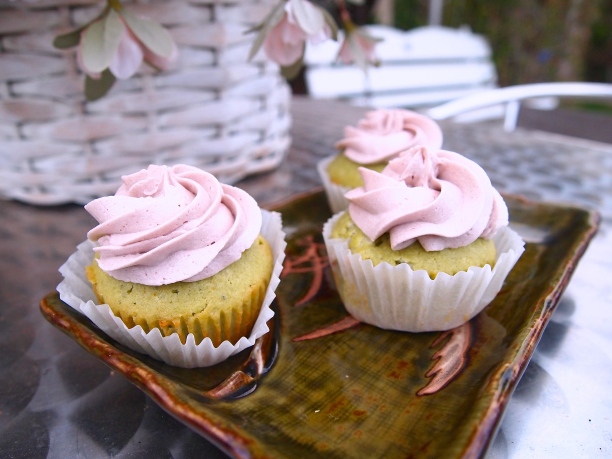
I’ve been meaning to bake these cupcakes for sometime now, and I’m so glad I finally did! The Matcha Cupcakes were absolutely delicious and the Azuki Bean Frosting complimented the cupcakes perfectly. If you’re in the mood to try baking something more exotic, but still very easy, this is the recipe for you.

OLYMPUS DIGITAL CAMERA

Basic ingredients such as flour, eggs & butter were all purchased from Stater Bros. The matcha powder and red bean paste were purchased from HMart – but you should be able to find them at any Asian supermarket like 99 Market, Mitsuwa or Marukai.

OLYMPUS DIGITAL CAMERA OLYMPUS DIGITAL CAMERA

I only made a dozen of these cupcakes this time, but I really wish I had made more! My dad actually said they were some of the best cupcakes I’ve ever made and the rest of my family really enjoyed them as well. I’ll definitely be baking up some more in the future – maybe for a family gathering or casual event.

OLYMPUS DIGITAL CAMERA OLYMPUS DIGITAL CAMERA

I also finally got to test out my new 1M Wilton frosting tip, which was pretty exciting! I’ve tried out some other less expensive brands, but finally gave into all the Wilton hype and purchased a few tips online. Best. decision. ever.

OLYMPUS DIGITAL CAMERA

For the cupcakes, I used a modified recipe from the The Little Epicurean and for the frosting, I tweaked the Brown Eyed Baker’s vanilla buttercream frosting.

Ingredients & Costs:

Matcha Cupcakes

  • 1 3/4 cup all purpose flour = $0.49
  • 1 cup granulated sugar = $0.16
  • 1 Tbsp matcha powder = $0.19
  • 1/2 Tbsp baking powder = $0.03
  • 1/2 tsp salt = $0.01
  • 1/2 cup unsalted butter, cut into cubes, room temperature = $1.13
  • 2 large eggs = $0.62
  • 2/3 cup milk = $0.37

Azuki Bean Frosting

  • 3/4 cup (6 ounces) unsalted butter, at room temperature = $1.69
  • 2 cups powdered sugar = $0.80
  • 4 tbsp red bean paste = $0.20

Grand Total = $5.69

Directions:

Original recipes makes approximately 12 cupcakes

Cupcakes

1. Preheat over to 325 degrees F. Line cupcake pan with cupcake pan with cupcake liners. Set aside.
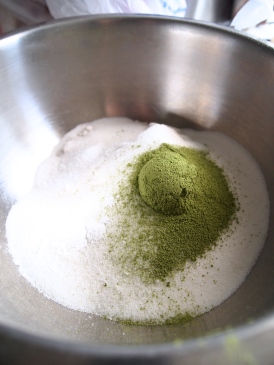
2.  Whisk flour, sugar, matcha powder, baking powder and salt in the bowl until combined.  Add butter cubes and mix until just coated with the dry ingredients.
3.  In a large measuring cup, whisk together eggs and milk.  Add the wet ingredients to the dry in three additions while the mixer is on medium speed. Mix until all ingredients are incorporated but make sure not to overbeat.
4.  Divide batter among lined cupcake pan, filling a little over 2/3 full.  Bake 18-23 minutes, until a toothpick inserted in the center comes out clean. Transfer to wire rack to cool.

Frosting

1. Using the wire whisk attachment of your stand mixer, whip the butter on medium-high speed for 5 minutes, stopping to scrape the bowl once or twice.

2. Reduce the speed to low and gradually add the powdered sugar. Once all of the powdered sugar is incorporated, increase the speed to medium-high and add the red bean paste, mixing until incorporated. Whip at medium-high speed until light and fluffy, about 2 minutes, scraping the bowl as needed.

You can store any unused frosting in the refrigerator in an airtight container; let it come to room temperature and then give it a quick whip in the mixer before using. Stores cupcakes in airtight container for up to 4 days.

Thanks for reading this blog post. Feel free to leave comments & questions you may have and I wish you all the best on your next baking adventure!

Happy Baking,

Cindy

Giant Batches of Mini Chocolate Chip Cookies

OLYMPUS DIGITAL CAMERA

Want to bake the most amazing chocolate chip cookies? Look no further. I’ve found the ultimate recipe! These mini cookies are perfect for putting in goodie bags or serving during parties and casual gatherings. They’re very simple to bake and always a favorite among kids and those who prefer bite-size treats.

OLYMPUS DIGITAL CAMERADoesn’t that cookie dough look delicious though?! That was the first thing I saw when I walked into best friend’s house. And like any normal person, all I wanted to was take a giant scoop and devour it.

Instead of baking by myself this week, I decided to help out one of my closest friends, Cara, who had to bake some treats for an event the following day. She actually prepared the cookie dough before I came over since we didn’t think we would have enough time to bake them and put them in goodie bags in just a few hours.

OLYMPUS DIGITAL CAMERA OLYMPUS DIGITAL CAMERA

Cara and I have both been obsessed with baking ever since we were in high school. She was the one who originally introduced me to the Award Winning Soft Chocolate Chip Cookies Recipe that we’ve modified and shared with you today. We’ve both tried out some other chocolate chip cookie recipes, but this one is head and shoulders above the rest.

OLYMPUS DIGITAL CAMERAThe cookies turned out extremely soft but still held together very well. I told myself I wouldn’t have one until we were done baking them all but I couldn’t resist! I have to admit that the smell of chocolate chip cookies baking in the oven is one of my favorite scents. Anyone else a big fan?

OLYMPUS DIGITAL CAMERA

Tip of the Day: Goodie bags can get pretty expensive, so why not just cut off the top liner of a Ziploc bag? Way more cost-efficient and most people won’t even notice.

Cara’s Chocolate Chip Cookies

Ingredients & Costs:

  • 4 ½ cups all-purpose flour = $1.26
  • 2 teaspoons baking soda = $0.02
  • 2 cups butter, softened = $4.50
  • 1 ½ cups packed brown sugar = $0.16
  • ½ cup white sugar = $0.08
  • 3 (3.4 oz) packages instant vanilla pudding mix = $2.82
  • 4 eggs = $1.24
  • 1 tablespoon vanilla extract = $0.30
  • 8 cups semisweet chocolate chips = $8.00

Grand Total = $18.38

Directions:

Original recipes makes approximately 182 mini cookies

  1. Preheat oven to 350 degrees F (175 degrees C). Line cookie sheet with baking paper or aluminum foil. Set aside.
  2. Sift together flour and baking soda. Set aside.
  3. In a large bowl, cream together butter, brown sugar & white sugar. Beat in instant vanilla pudding mix until browned. Beat in eggs, vanilla & flour mixture. Finally, stir in chocolate chips.
  4. If time permits, please refrigerate for 1-3 days before baking to allow ingredients to combine and flavors to develop.
  5. Drop rounded spoonfuls of cookie dough onto baking sheet. Bake 10-12 minutes until golden brown on the edges.

Store cookies in airtight container for up to 5 days.

Please let me know in the comments if you attempt baking these! Cara and I would love to hear how they turn out. 🙂

Happy Baking,

Cindy

Banana Bars with Brown Sugar Frosting

OLYMPUS DIGITAL CAMERA
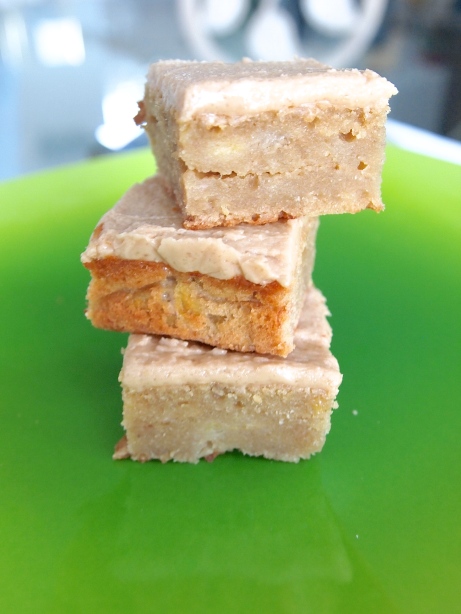
This morning, I found two overripe bananas in my kitchen. Most people would just throw them out, which can definitely become annoying when it’s a regular occurrence. But for bakers, this can actually be a nice little surprise! Even though I usually use overripe bananas to bake banana bread, I decided to switch things up today and make these super moist banana bars and topped them with some brown sugar frosting.
OLYMPUS DIGITAL CAMERA OLYMPUS DIGITAL CAMERA
I was totally expecting the brown sugar frosting to be too sweet. I mean the majority of it is sugar, right? But I was pleasantly surprised! The brown sugar gave it some nice depth and I was really tempted to add some bourbon to give it a little zing. In the end, I decided to stick to the original recipe.
OLYMPUS DIGITAL CAMERA OLYMPUS DIGITAL CAMERA
If I could give you one tip, it would be to stick it in the freezer for 10 minutes after you’ve let it cool at room temperature for 5 minutes or so. I’ve found that this helps keep the bars super moist.
OLYMPUS DIGITAL CAMERA
This is a slightly modified recipe from Cookies & Cups and ingredients were purchased from Stater Bros & Grower’s Direct.

Ingredients & Costs:

Bars

  • ½ cup butter = $1.13
  • 1 cup light brown sugar = $0.11
  • 1 egg = $0.31
  • 1½ tsp vanilla = $0.15
  • ¼ tsp salt = $0.01
  • 1 1/2 cups flour = $0.45
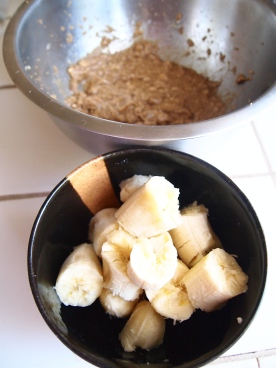
  • 1 cup mashed banana (2 medium bananas) = $0.69

Brown Sugar Frosting

  • ¼ cup butter, cubed = $0.56
  • ½ cup light brown sugar = $0.06
  • 2 Tbsp milk = $0.04
  • 1 cup powdered sugar = $0.40

Grand Total = $3.91

Directions:

Original recipes makes 16 bars

Bars:

  1. Preheat oven to 350°. Line an 8×8 baking dish with foil and spray with cooking spray. Set aside.
  2. Beat together butter and sugar.  Add in egg and vanilla and continue mixing until incorporated.
  3. Whisk together salt & flour. Add salt, flour and banana until batter is smooth and even. Spread in prepared pan.
  4. Bake for 25-30 minutes until center is set. Frost once they are mostly cooled.
Brown Sugar Frosting:
  1. In a medium saucepan melt butter. Add brown sugar and milk and stir until sugar has completely melted and mixture is smooth. Remove from heat, allow to cool for 10 minutes.
  2. Whisk in powdered sugar and add more milk if necessary.
  3. Spread frosting on top of bars and allow it to set completely before cutting into squares.

Store bars in the refrigerator for up to 3 days or at room temperature in an airtight container for 5 days.

If you have any questions or suggestions, feel free leave them in a comment below.  And as always, I’d love to hear how your bars turn out! 🙂

Happy Baking,

Cindy

Halloween Treats: Pumpkin Spice M&M Cookies

OLYMPUS DIGITAL CAMERA

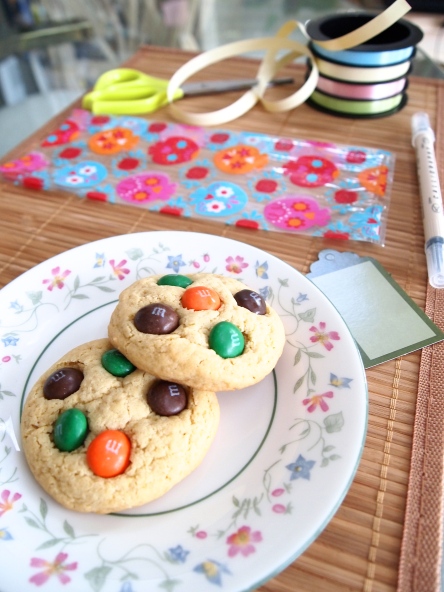
I can’t believe it’s almost the end of October. Which also means, it’s almost Halloween! Do you have anything planned? Already know what you’re dressing up as? Unfortunately, I won’t be attending any parties this year – instead, I’ll be handing out sweets…what kind of sweets you ask? Pumpkin Spice M&M Cookies! 🙂

I decided to kill two birds with one stone by doing my weekly baking AND using them as sweet treats for the neighborhood trick or treaters. While trying to figure out what to bake, I skimmed over a number of articles for ‘Halloween Treats for Kids’, but everything seemed to be cupcakes or truffles or just something that was too temperamental and would easily get destroyed in kids’ Halloween candy baskets. Finally, I found Martha Stewart’s Chewy Caramel Mystery Cookies and I remembered as a kid, I always loved M&M cookies (probably because of all the sugar & chocolate). So I knew this would be the perfect thing to bake. 

   OLYMPUS DIGITAL CAMERA OLYMPUS DIGITAL CAMERA

The secret ingredient is, without a doubt, the vanilla pudding mix. I know, I know. They may not be the healthiest cookies ever, but the preservatives in the pudding mix make these cookies extremely soft with a nice golden brown crunch on the edges.

OLYMPUS DIGITAL CAMERA OLYMPUS DIGITAL CAMERA

To make these cookies, I modified a chocolate chip cookie recipe from Allrecipes by Debbi. This recipe has a 4.5/5 rating and over 7500 reviews, so she must be doing something right! Allrecipes is definitely one of my top go-to websites for basic baking recipes.

If you’re also wondering where I got my ingredients, I picked most of them up from Stater Bros. and the pumpkin spice M&Ms, pudding mix, treat bags, ribbon, and calligraphy pen from Target.

OLYMPUS DIGITAL CAMERA

Ingredients & Costs:

  • 2 1/4 cups all-purpose flour = $0.63
  • 1 teaspoon baking soda = $0.01
  • 1 teaspoon baking powder = $0.02
  • 1 cup butter, softened = $2.25
  • 3/4 cup packed brown sugar = $0.08
  • 1/4 cup white sugar = $0.04
  • 1 (3.4 ounce) package instant vanilla pudding mix = $0.94
  • 2 eggs = $0.62
  • 1 tablespoon vanilla extract = $0.30
  • 1 – 1 1/2 cups pumpkin spice M&Ms = $2.60

Grand Total = $7.40

Directions:

Original recipes makes approximately 2 – 2 1/2 dozen cookies

  1. Preheat oven to 350 degrees F (175 degrees C). Line cookie sheet with baking paper or aluminum foil. Set aside.
  2. Whisk the flour, baking soda & baking powder together. Set aside.
  3. In a large bowl, cream the butter until light and fluffy, then incorporate the brown sugar and white sugar. Beat in the instant pudding mix until blended. Stir in the eggs and vanilla. Blend in the flour mixture. Drop cookies by rounded spoonfuls onto cookie sheets with your hands or with a cookie-dough scooper.
  4. Bake for 10 to 12 minutes in the preheated oven. Edges should be slightly golden brown. Press 5 or so M&Ms onto the cookies right after they get out of the oven. Let them cool for at least 10-15 minutes before consuming.

Store cookies in airtight container for up to 6 days.

And that’s it friends! This is such a quick and easy recipe that all kids will definitely love. I mean really, who doesn’t love cookies and candy, right?

If you do attempt baking these cookies, please let me know. I’d love to hear how they turned out!

Happy Baking,

Cindy

Pumpkin Banana-Oat Cupcakes with Pumpkin Cookies n’ Cream Frosting

OLYMPUS DIGITAL CAMERA

Are you sick of pumpkin yet? I sure hope not! This week I’ll be showing you guys how I made these delicious Pumpkin Banana-Oat Cupcakes with Pumpkin Cookies n’ Cream Frosting.

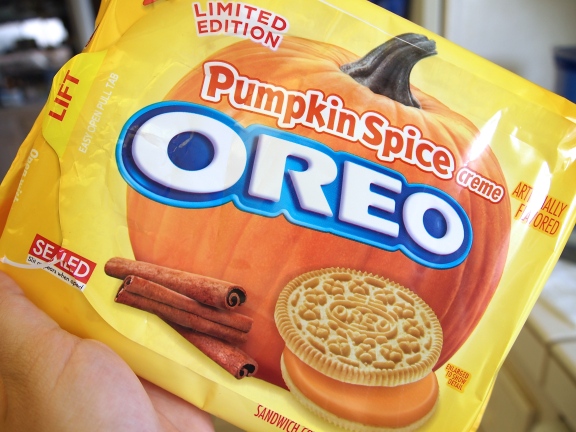
As you might have already guessed, I’m a huge pumpkin-spice fan, so when I heard that OREO was releasing pumpkin-spice cookies, I obviously had to grab a pack when I went grocery shopping. After having a few, I realized that it probably wouldn’t be the best idea to finish the whole pack by myself…so I decided to incorporate them into my baking this week.


OLYMPUS DIGITAL CAMERA

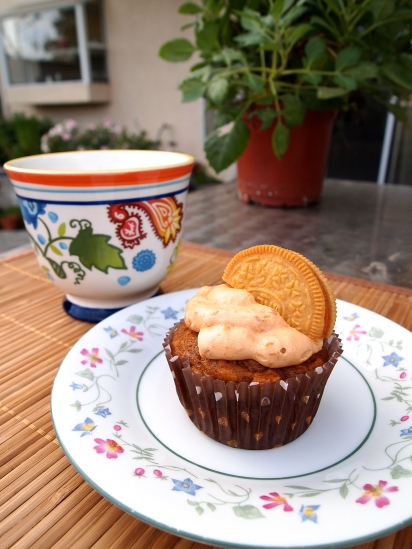
I had my friends and family try a few cupcakes and we all agreed that the frosting was the best part — just the right amount of sweetness & the pumpkin-spice icing from the Oreo cookies already had a lot of great flavor. The only downside is that the cookie gets a bit soggy after being in the frosting for a few hours.

*Piping tip: Make sure that you use a wider frosting tip or crush the cookies very finely. Otherwise, the cookie crumbs in the frosting will not be able to escape the tip easily, and that will make it a lot harder for you to frost your cupcakes.


OLYMPUS DIGITAL CAMERA OLYMPUS DIGITAL CAMERA

As an amateur baker, this was also a fairly exciting week for me. I finally purchased my very own handheld mixer, which made whipping up the frosting significantly easier. No more sore arms for me!

I also bought some Wilton frosting tips, a re-usable decorating bag and a great cookie/cupcake carrier. All items were purchased through Amazon.


OLYMPUS DIGITAL CAMERA

To create these cupcakes and frosting, I modified two recipes I found on Allrecipes (Banana Pumpkin Bread & Quick and Almost-Professional Buttercream Icing).

Ingredients & Costs

Cupcakes

  • 3 ripe bananas, mashed = $1.04

  • 2 eggs = $0.62

  • 1/3 cup vegetable oil = $0.17

  • 3/4 cups canned pumpkin puree = $2.24

  • 1/2 cup honey = $1.16

  • 1/2 cup white sugar = $0.08

  • 1 1/2 cups all-purpose flour = $0.45

  • 1 cup rolled oats = $0.26
  • 1 teaspoon baking powder = $0.02

  • 1 teaspoon baking soda = $0.01

  • 1/2 teaspoon salt = $0.01

  • 2 teaspoons pumpkin pie spice = $1.04

  • 1 1/2 teaspoons ground cinnamon = $0.35

Frosting

  • 1/2 cup unsalted butter, softened = $1.13

  • 2 1/2 cups confectioners’ sugar, sifted = $0.99

  • 1 1/2 teaspoons vanilla extract = $0.15

  • 2 tablespoons milk = $0.04

  • 16 pumpkin-spice Oreos = $1.99

Grand Total = $11.75

Directions

Original recipes makes 18 – 22 cupcakes

Cupcakes

  1. Preheat oven to 350 degrees F (175 degrees C). Line a 12-cupcake pan with cupcake liners. Set aside.
  2. In a large bowl, whisk together the mashed banana, eggs, oil, pumpkin, honey and sugar. Combine the flour, baking powder, baking soda, salt, pumpkin pie spice and cinnamon, stir into the banana mixture until just combined.
  3. Scoop the batter evenly into cupcake liners. Each liner should be between 1/2 – 3/4 of the way full.
  4. Bake at 350 degrees F (175 degrees C) for 20 – 24 minutes, or until a toothpick inserted into the center of the cupcake comes out clean. Remove the cupcakes from the pan and let cool.

Frosting

  1. Cut Oreos in half and separate into two groups. With one group, separate the pumpkin-spice frosting from the cookie and place into a large bowl. Crush the cookies until until very fine and set aside.
  2. Cream room temperature butter with pumpkin-spice frosting with a hand mixer, the paddle attachment of a stand mixer, or a wooden spoon until smooth and fluffy. Gradually beat in confectioners’ sugar until fully incorporated. Beat in vanilla extract and incorporate crushed cookies.
  3. Pour in milk if necessary and beat for an additional 3-4 minutes until light and fluffy.
  4. Once the cupcakes are fully cooled, frost cupcakes with pumpkin cookies n’ cream frosting and top with half of an OREO.

Store cupcakes in the refrigerator for up to 3 days or at room temperature in an airtight container for 5 days.

Feel free to try out this recipe and please leave a comment with any questions or suggestions you may have.  As always, I’d love to hear how your cupcakes turned out! 🙂

Happy Baking,

Cindy

Chocolate Cupcakes With Salted Caramel Frosting

OLYMPUS DIGITAL CAMERA

Happy National Chocolate Cupcake Day! What’s on the dessert menu today? Yep, you got it – some rich, fudgy & moist chocolate cupcakes. And to top ’em off, I added some salted caramel frosting with a light drizzle of caramel sauce. Absolutely delish!

I was originally planning to bake some apple cinnamon cupcakes today, but when I found out that it was going to be National Chocolate Cupcake Day, I knew I just had to share my favorite chocolate cupcake recipe with you guys! I’ve been using this particular recipe ever since I started baking. Even though I’m not usually a fan of box mixes, this one just works and it’s perfect for when you don’t have time to measure out all your dry ingredients. And honestly, most people can’t tell that it’s a “doctored box mix” recipe.

OLYMPUS DIGITAL CAMERAOLYMPUS DIGITAL CAMERA

Fun Fact: There are currently two theories about how cupcakes got their name. One claims that they were baked in cups and the other suggests that the name comes from the recipe, which was measured out by the cup.

Personally, I wouldn’t really care if it was called a bowlcake, cake-in-a-mug or moldcake — I’d still devour them.

OLYMPUS DIGITAL CAMERA OLYMPUS DIGITAL CAMERA

These cupcakes are great for parties and the salted caramel frosting is to-die-for, especially during the Fall.

You can use store-bought salted caramel sauce, but I highly recommend making the salted caramel sauce yourself. The flavor is more intense and of course, it’s much less sugary and artificial.

OLYMPUS DIGITAL CAMERA

My final product ended up being a modified version of Denise’s Too Much Chocolate Cake and the Two Peas’ Salted Caramel Frosting.

I also purchased most of my ingredients from Stater Bros. They always have great sales on their products and their variety of basic baking ingredients is fantastic.

Ingredients & Costs:

Cupcakes

  • 1 box Devil’s Food Cake Mix = $1.49
  • 1 (5.9 oz) box Jello Chocolate Fudge instant pudding mix = $0.99
  • 4 large eggs = $1.29
  • 1/2 cup vegetable oil = $0.25
  • 1/2 cup milk = $0.28
  • 1/2 cup of warm water = $0.04
  • 1 cup sour cream = $1.79
  • 1 cup of semi-sweet chocolate chips = $1.00

Salted Caramel Sauce

  • 1/2 cup of dark brown sugar = $0.06
  • 1/2 cup of granulated sugar = $0.08
  • 1 stick or 8 tablespoons unsalted butter, cut into pieces = $1.13
  • 1/2 cup heavy cream = $0.92
  • 1/2 tablespoon sea salt flakes or table salt = $0.03

Frosting

  • 3/4 cup butter (1 & 1/2 sticks), at room temperature = $1.69
  • 3-4 cups powdered sugar = $1.19
  • 1/2 cup salted caramel sauce

Grand Total = $12.23

Directions:

Original recipes makes 24-28 cupcakes

Cupcakes:

1. Preheat your oven to 350°F. Line a 12-cupcake pan with cupcake liners. Set aside.

2. Whisk together the cake mix & pudding mix, then combine the eggs, oil, milk, water and sour cream into the mixture. Beat until well combined and there are minimal lumps. Gently fold in chocolate chips.

3. Scoop the batter evenly into cupcake liners. Each liner should be between 1/2 – 3/4 of the way full.

4. Bake for 20 to 25 minutes, or until a toothpick inserted in the center comes out clean. Remove the cupcakes from the pan and let cool.

Salted Caramel Sauce:

1. While the cupcakes are baking, make the salted caramel sauce.  Heat the sugar over medium high-heat in the bottom of a heavy 2-3 quart saucepan. When the sugar starts to melt, start whisking the sugar. The sugar will clump up, but keep whisking. Continue cooking the sugar until it reaches a deep amber color. It should reach about 350°F. This is where it is easiest to burn the caramel so make sure to keep an eye on it.

2. As soon as the sugar reaches the dark amber color, carefully add the butter. Whisk until butter is melted.

3. Remove the pan from the heat and carefully pour in the heavy cream. Whisk until cream is incorporated and caramel is smooth. Whisk in the sea salt flakes or table salt.

4. Let the caramel sauce cool for about 10 minutes in the pan and then pour into a medium-sized metal bowl. Set aside.

Salted Caramel Frosting:

1. Beat the butter in the bowl until it is light and fluffy. Slowly add 1 cup of powdered sugar at a time, and mix until completely incorporated.

2. Add the salted caramel sauce and beat frosting until airy and thoroughly mixed.

3. Once the cupcakes are fully cooled, frost cupcakes with salted caramel frosting and drizzle with salted caramel sauce.

Store cupcakes in the refrigerator for up to 3 days or at room temperature in an airtight container for 5 days.

Feel free to like, share or reblog this post and please leave a comment with any questions you may have.  I’d love to hear how your cupcakes turned out and how you celebrated National Chocolate Cupcake Day!

Happy Baking,

Cindy

Pumpkin Oatmeal Cookies with Chocolate Chips, Cranberries & Pecans

OLYMPUS DIGITAL CAMERA

It’s that time of year again. That time where you are bombarded with an abundance of pumpkin-spice recipes, snacks & drinks. But hey, I’m not complaining! Pumpkin is definitely one of my favorite ingredients to use during the Fall and I’m always looking for new ways to incorporate it into my desserts.

Today, I’ll be showing you how to make pumpkin oatmeal cookies with chocolate chips, cranberries & pecans. They’re perfect for casual gatherings or simply as an afternoon snack.

I bought most of my groceries from Stater Bros. and there were quite a few items on sale. Obviously, your total costs will most likely not be the same as mine, but hopefully this will give you a good estimate!

Ingredients & Costs:

  • 2 cups + 2 Tablespoons all-purpose flour = $0.60
  • 1 teaspoon baking soda = $0.01
  • 1 teaspoon baking powder = $0.02
  • 1 Tablespoon ground cinnamon = $0.58
  • 1 and 1/2 teaspoons pumpkin pie spice = $0.78
  • 1/2 teaspoon salt= $0.01
  • 1 and 1/2 cups old-fashioned rolled oats = $0.40
  • 1 cup (2 sticks) unsalted butter = $2.25
  • 3/4 cup dark brown sugar = $0.08
  • 1/2 cup granulated sugar = $0.08
  • 1 egg = $0.31
  • 3/4 cup pumpkin puree (Libby’s brand preferred) = $2.24
  • 1 teaspoon vanilla extract= $0.10
  • 1/2 cups semi-sweet or dark chocolate chips = $0.50
  • 1/2 cup of dried cranberries = $1.99
  • 1/2 pecans = $1.99

Grand Total = $11.94

Directions:

Original recipes makes 2 and 1/2 dozen cookies

1. Preheat the oven to 350F degrees and prepare a baking sheet with parchment paper or aluminum foil.

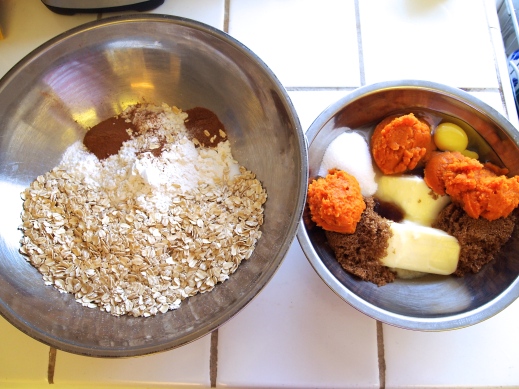
2. In a large bowl, toss the flour, baking soda, cinnamon, pumpkin pie spice, salt and oats together.

3. Heat the butter in the microwave until it turns a creamy texture (appx. 15-30 seconds). Whisk the butter, brown sugar & granulated sugar into a medium sized bowl. Once combined, whisk in the pumpkin, vanilla & egg.

OLYMPUS DIGITAL CAMERA

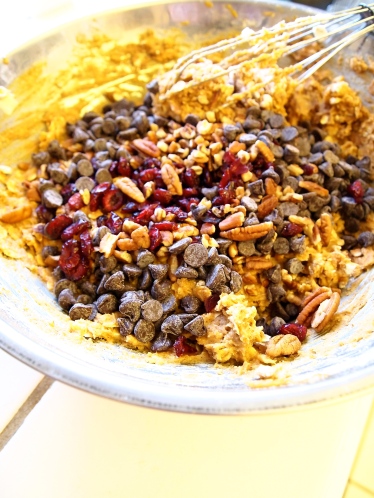
4. Pour into dry ingredients and gently mix. Then, delicately fold in the chocolate chips, cranberries and pecans. Don’t worry if the mixture is more wet than you expected – it’s supposed more of a cake-like cookie dough. Also, make sure not to over-mix!

OLYMPUS DIGITAL CAMERA

5. Scoop the cookie dough onto your prepared baking sheet. About 2 or 3 Tablespoons of dough per cookie. I used two spoons but using a cookie dough scooper would be more ideal. Feel free to flatten them slightly since theses cookies don’t spread out very much.

OLYMPUS DIGITAL CAMERA

6. Bake the cookies for 13-15 minutes until very lightly browned on the edges, and still appearing soft in the centers.

7. Allow the cookies to cool completely on the baking sheet and then enjoy! Store in an airtight container for up to 8 days.

OLYMPUS DIGITAL CAMERA

I hope you enjoyed reading my first blog post. Feel free to leave comments & questions, and I’d love to know how your cookies turned out!

Happy Baking,

Cindy